To get started, all you need is to download and print our Zigzag Pictures - The Four Seasons templates.
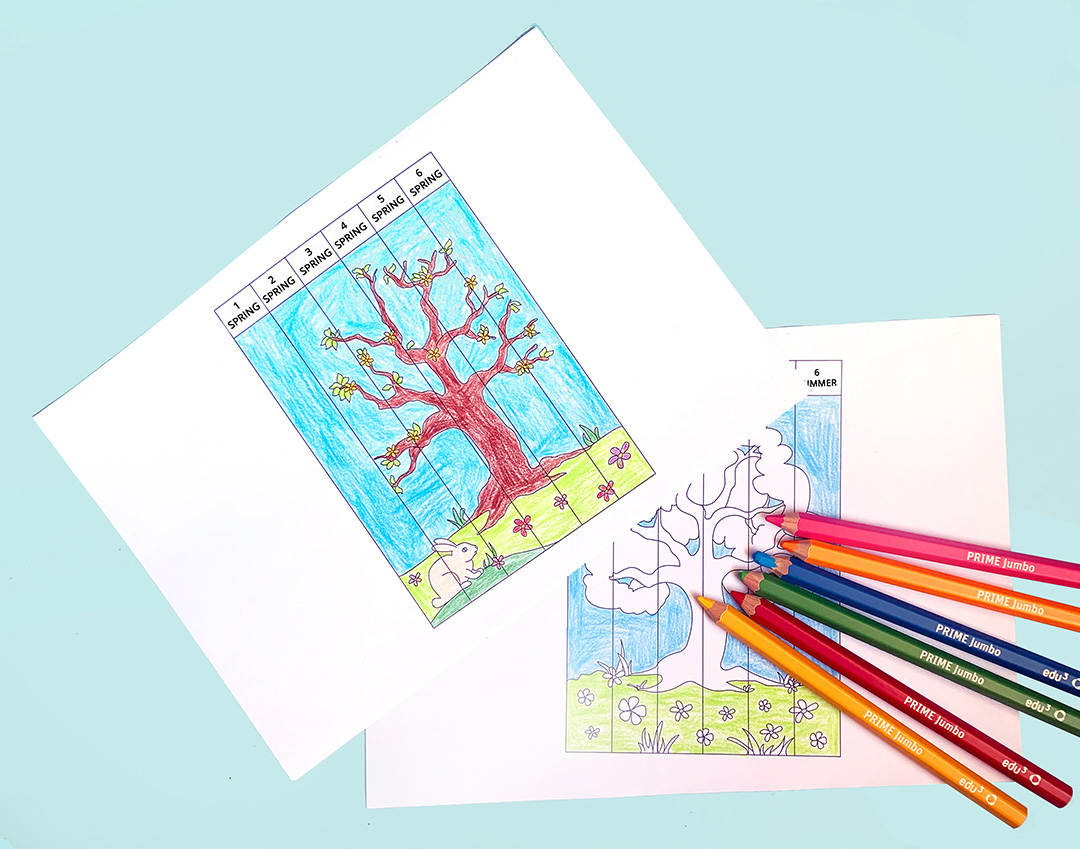
Choose two pictures, i.e. spring and summer, and print them out on white paper. Color them in.
.jpg)


To get started, all you need is to download and print our Zigzag Pictures - The Four Seasons templates.
Choose two pictures, i.e. spring and summer, and print them out on white paper. Color them in.
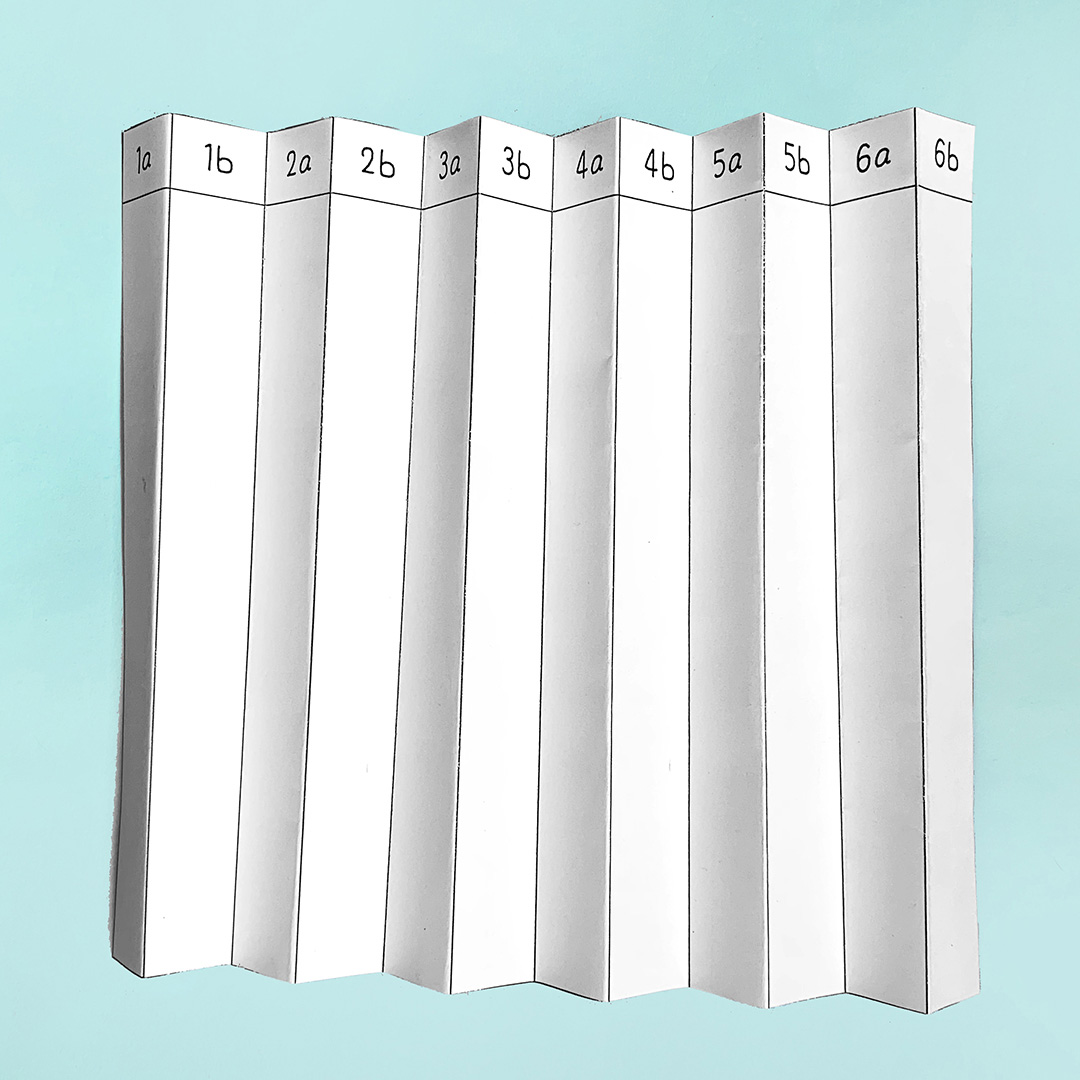
Print out the backing sheet on heavy white printing paper. Cut off the edges of the backing sheet, leaving the letters and numbers along the top edge.

Fold the backing sheet back and forth like a fan all the way to the end.
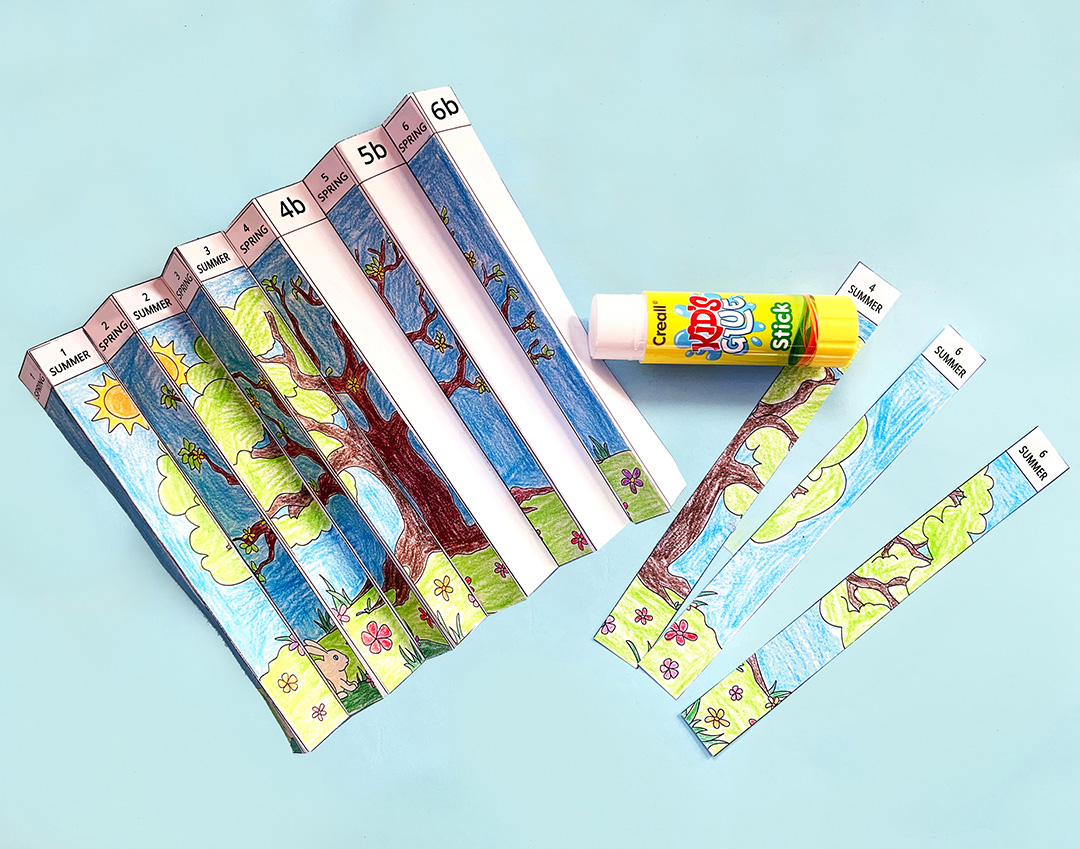
Cut off the edges of both of the pictures that you’ve colored in. Leave the letters and numbers along the top edge. Lastly, cut the pictures into strips along the dotted lines.

Stick the picture strips to the corresponding areas of the backing sheet: Strip 1 spring to area 1a, strip 1 summer to area 1b, strip 2 spring to area 2a, strip 2 summer to area 2b, etc.
Cut the letters and numbers along the top edge off. These were just to help you stick the picture strips on in the correct order.

Refold the picture like an accordion, pressing down along the edges with a folding tool or piece of wood if possible.

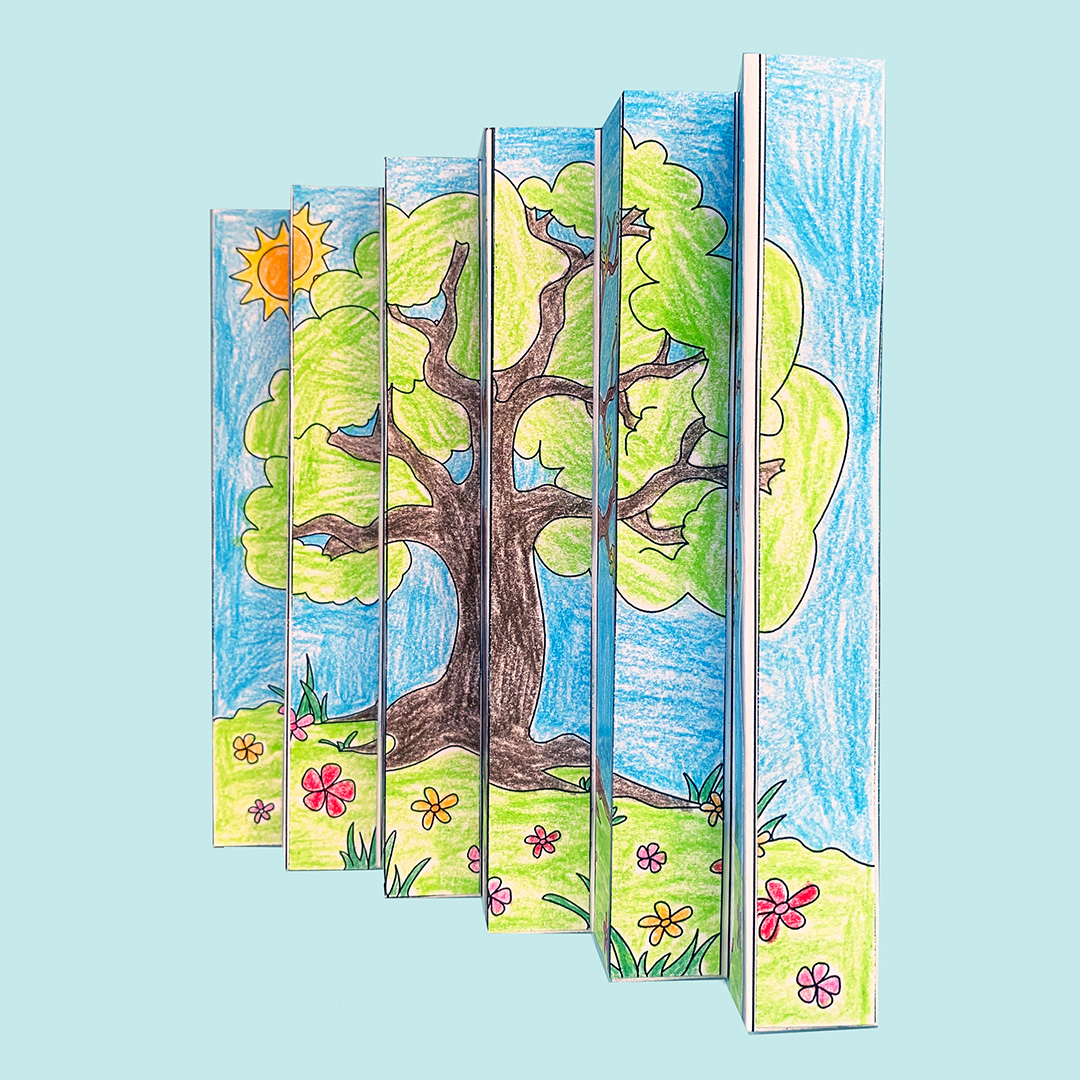
Pull the accordion apart a little and your agamograph is finished! If you look at the agamograph from one side and then the other, the picture will change.